Your Browser Is No Longer Supported. Please use an alternative browser to improve your experience and security.
Upcycle DIY: Create Your Own Propagation Wall
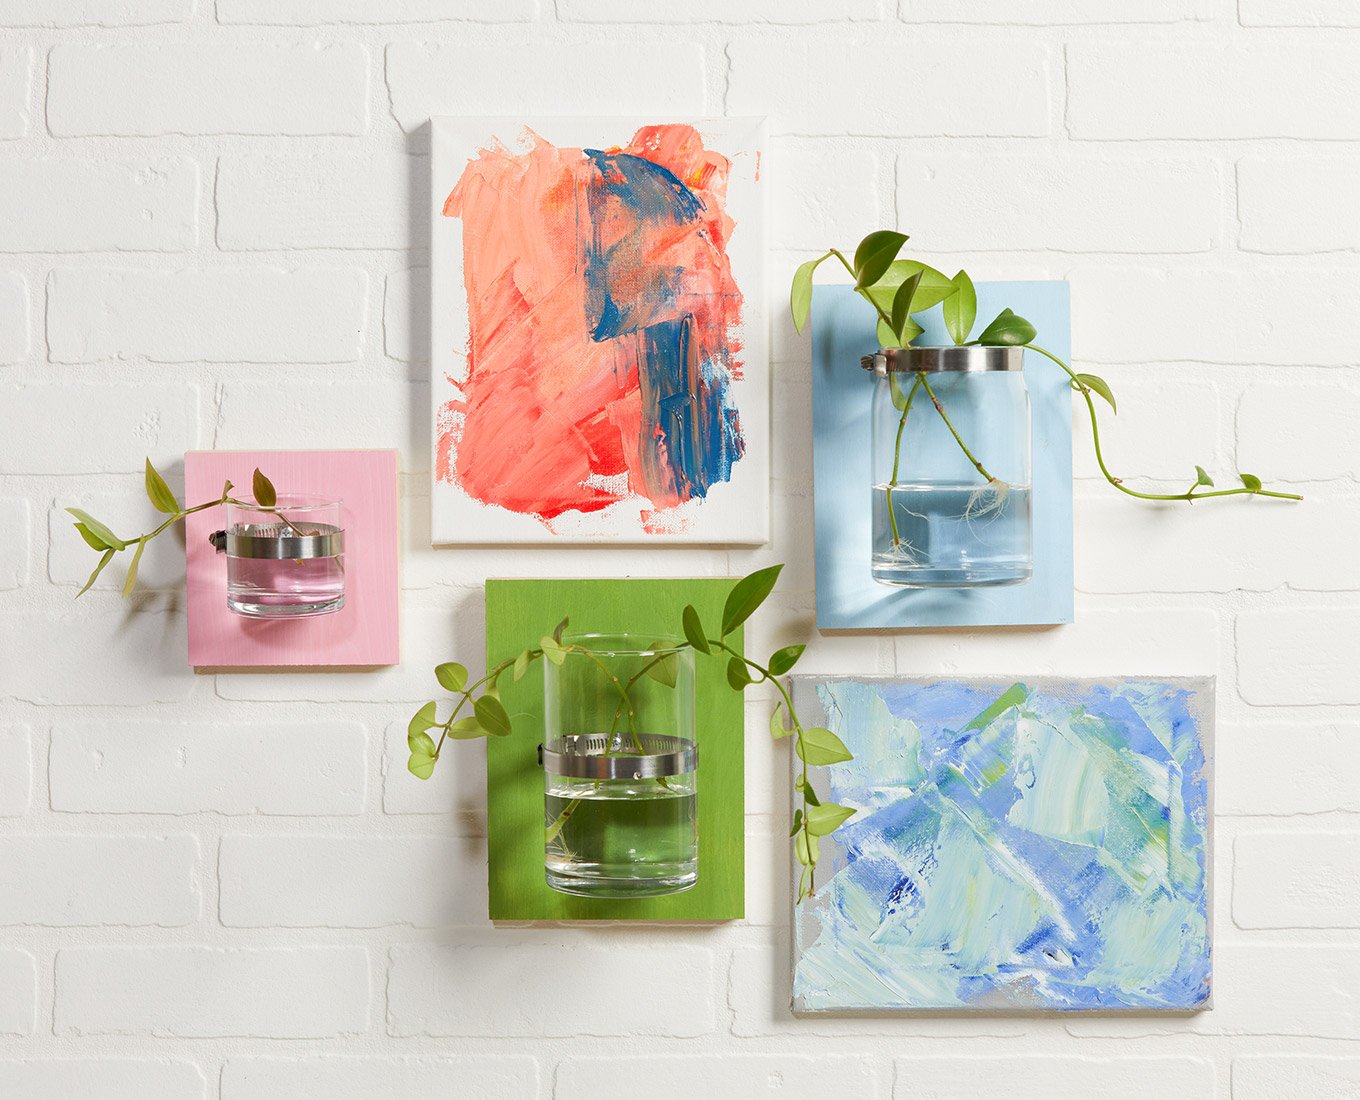
Maybe you’ve seen DIY propagation walls on Instagram or Pinterest, but what are they exactly? A propagation wall is a set of wall-mounted vases to help plant cuttings grow new roots. It’s a great way to grow new plants from ones you already have, and can also serve as a beautiful year-round floral display.
You can upcycle your empty candle vessel into your very own propagation wall. Here’s a step-by-step tutorial that’ll transform your space into a miniature plant paradise.
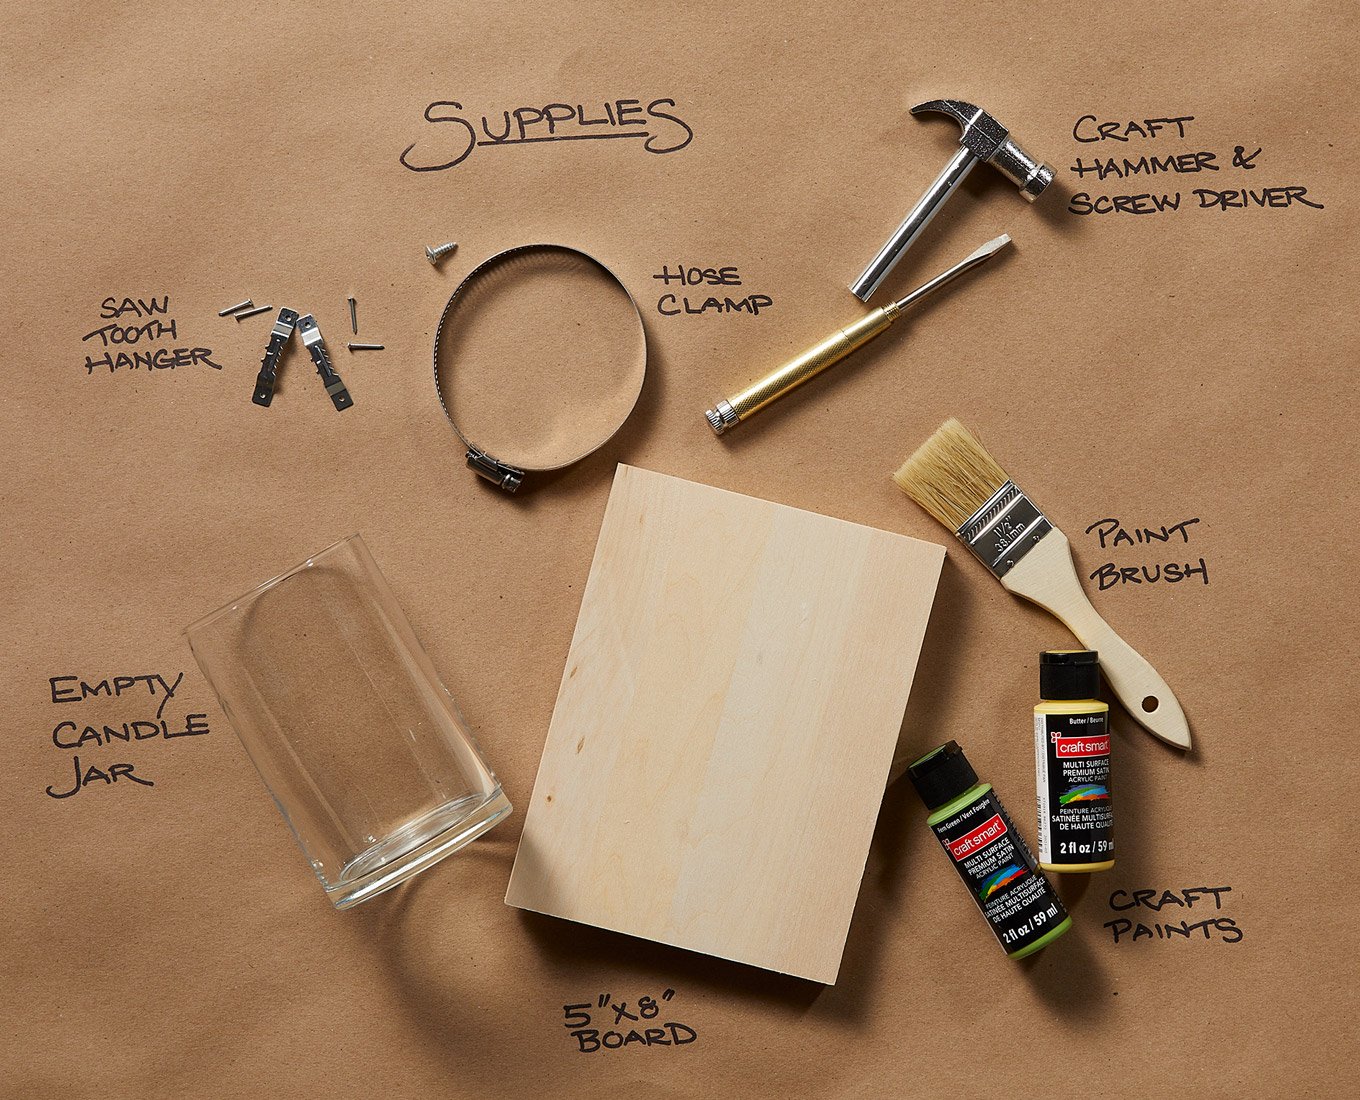
You Will Need:
• An empty jar candle or tumbler candle (make sure to clean out any leftover wax first)
• A wooden board, at least 1" thick and 1" longer/wider than your chosen candle vessel (we used a 5"x8" board for our 4"x6" Signature Large Tumbler Candle)
• 2 sawtooth hangers (+ 2 small nails per hanger)
• 1 hose clamp (+ 1 small screw)
• A craft hammer
• A screwdriver
• A paintbrush
• Craft paint in any color you like
• Plant cuttings or flowers to display
How to Create Your Own DIY Propagation Wall
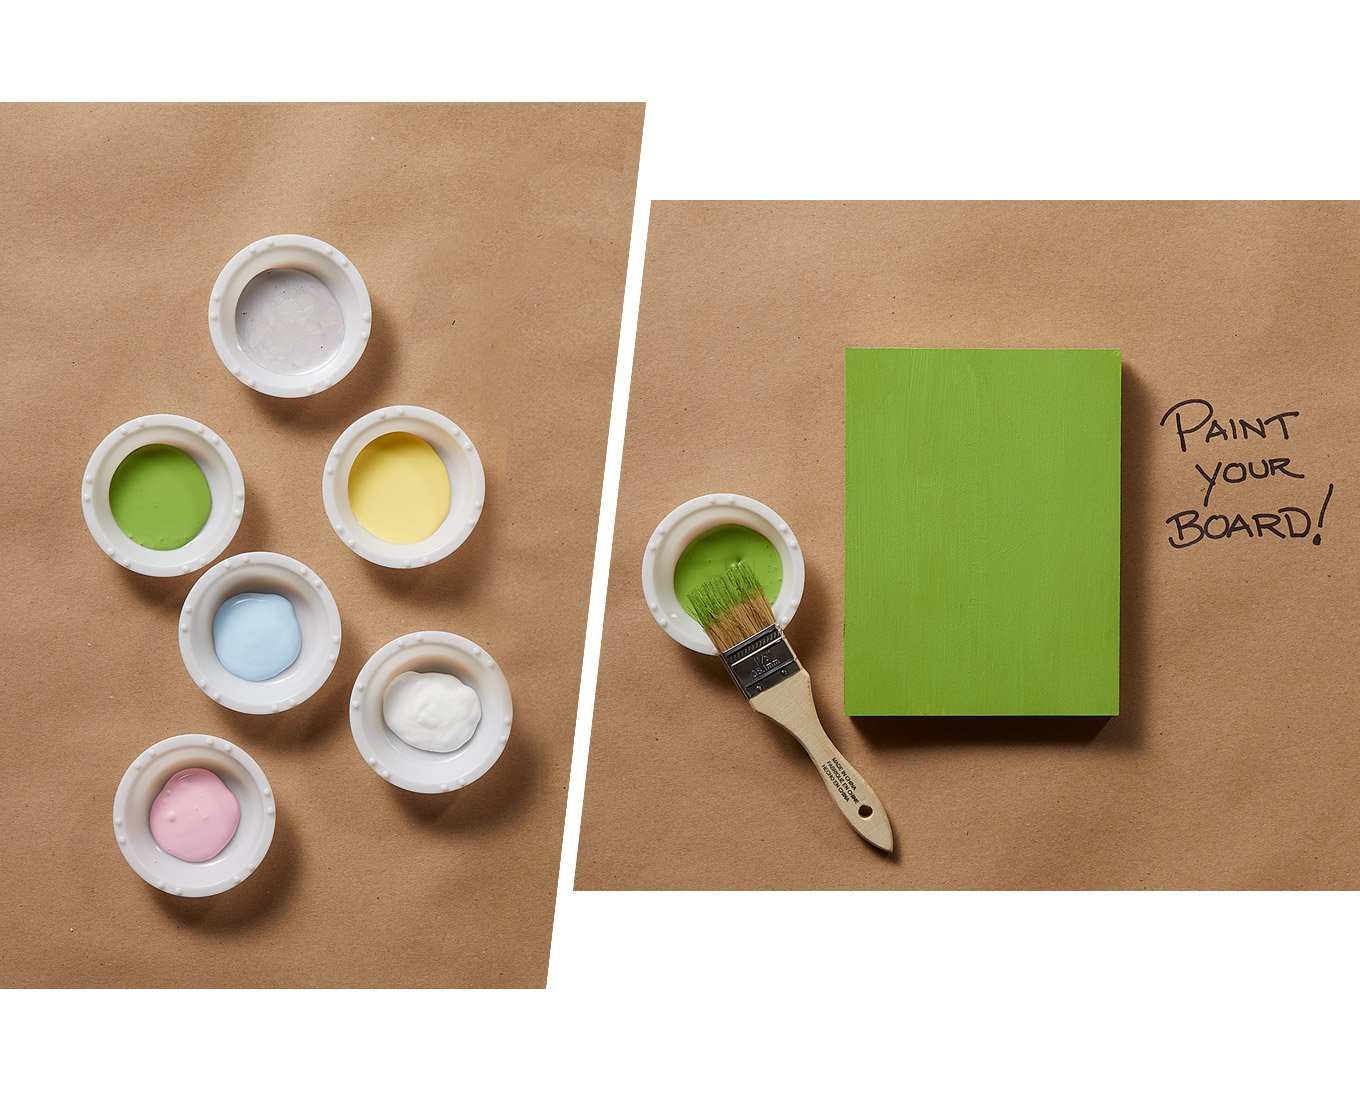
1. Paint Your Board
Since the wooden board will be the backdrop for your plant, you’ll want to paint it first! Pick your favorite color or paint a beautiful work of art that will look even more interesting when viewed through water and glass. To minimize mess, make sure the paint fully dries before moving to the next step. (If you prefer a more natural wooden look, you can skip painting altogether.)
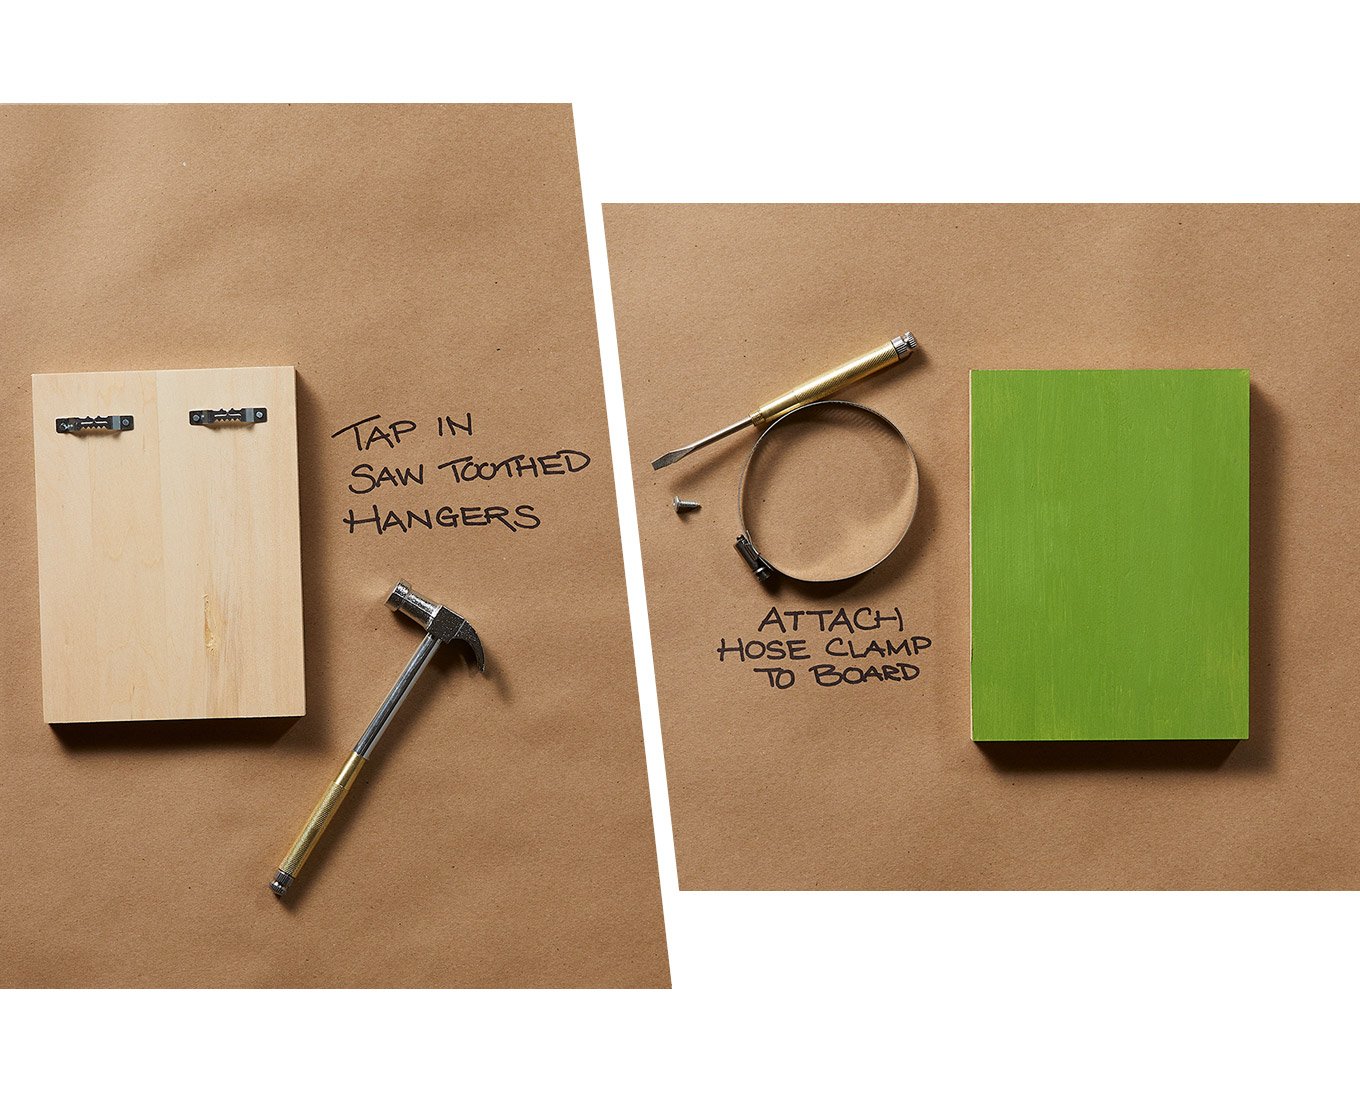
2. Attach the Hanging Hardware
Using your craft hammer, attach the sawtooth hangers to the back of the board with nails. Make sure the hangers are appropriately aligned with the surface you’ll be hanging the board from, so that it doesn’t fall off or hang crooked when finished. (It’s a good idea to choose a spot with natural light to help your plant grow.)
3. Attach the Hose Clamp
Center the hose clamp on the front of the board, positioned so that you can slide the candle vessel through it vertically. Use your screwdriver to attach the hose clamp to the board, making sure the small screw is tightly secured.
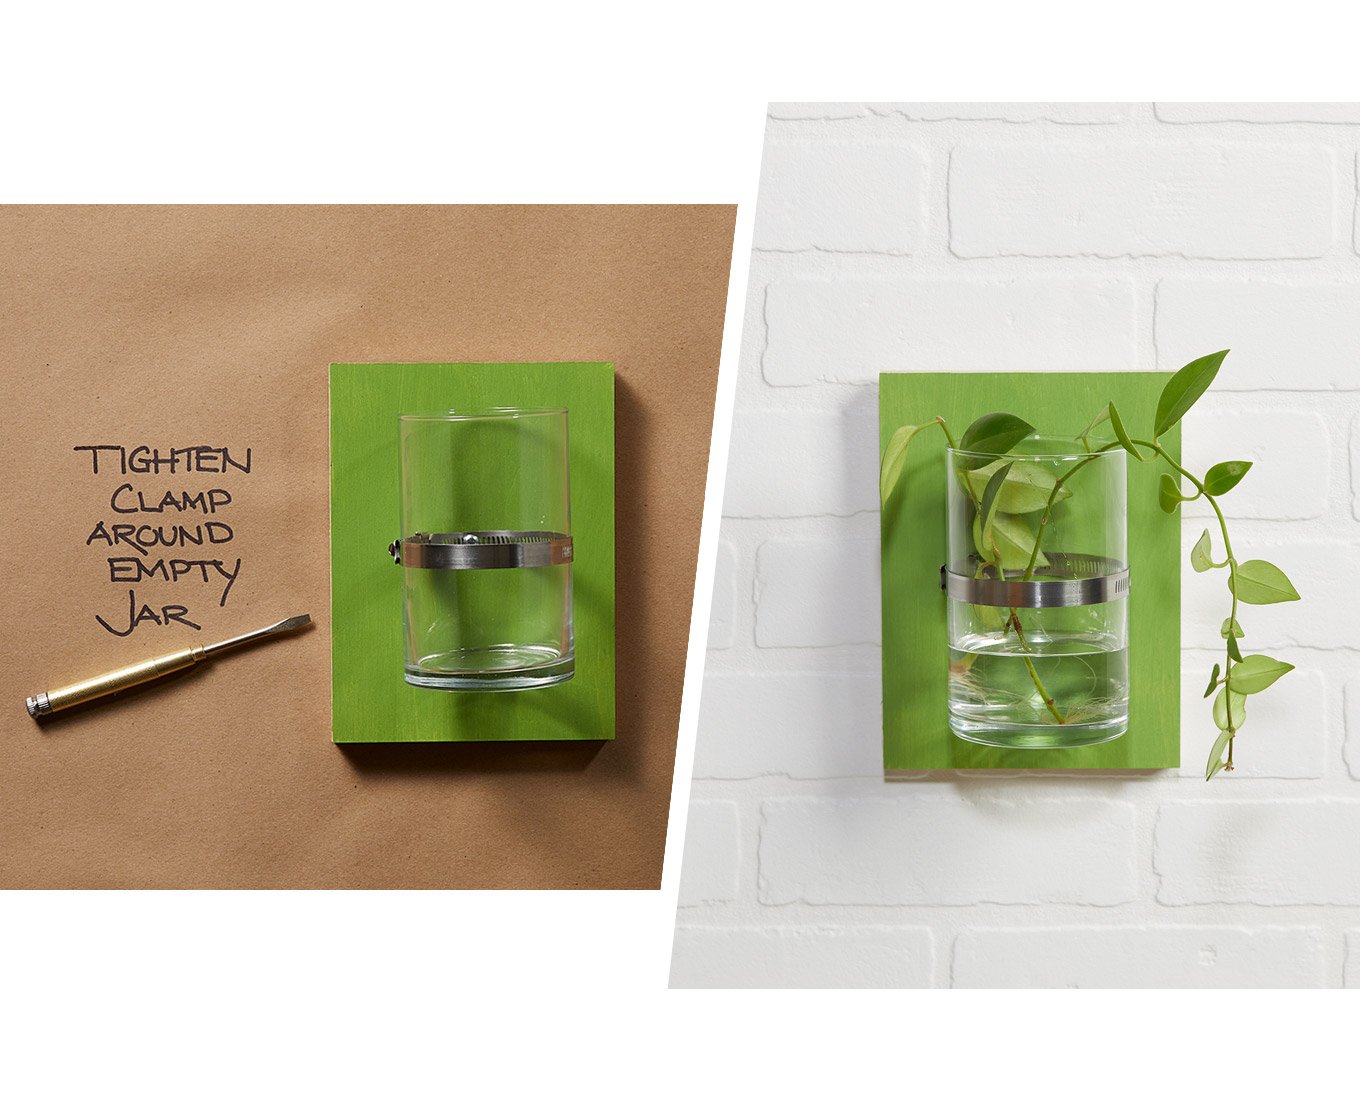
4. Add the Upcycled Jar
Slide the empty candle vessel through the hose clamp. Tighten the clamp so that it hugs the candle snugly around its middle.
5. Hang it Up!
Now that you’ve secured the empty candle vessel, you’re ready to hang your creation on the wall! Once it’s settled and sturdy, carefully pour some water into the vessel until it is about one-third full. Add your plant and enjoy watching it propagate over time. Don’t forget to replace the water as needed!
We'd love to see your finished DIY upcycle project. Share your results with us on social media using #UpcycleWithYC and don't forget to check out our blog for more upcycling and DIY inspiration.
DIY / Crafting